
Cake Decorating: A Beginner's Guide to Turntables
Posted by The BYC Team on Feb 28th 2026
Unlock your cake decorating potential with a cake decorating turntable! This beginner's guide will help you master the art of decorating like a pro, one spin at a time.
The Importance of a Turntable in Cake Decorating
Cake decorating is such a fun and creative art form! It really lets your imagination run wild while also requiring some precision and the right tools. One of the must-have tools for anyone getting into cake decorating is a turntable. It’s a game changer! A turntable lets you smoothly rotate your cake, making it super easy to reach all sides and decorate evenly. This is especially handy when you want to achieve those clean, professional-looking finishes that can be tricky otherwise.
Using a turntable can really make your cake decorating way more fun and efficient! Instead of stretching awkwardly to reach different sides of a cake, you can just spin the turntable and bring the area you want to work on right in front of you. This not only saves you time but also helps reduce the risk of smudging or damaging your decorations. Plus, with the ability to easily rotate your cake, you can apply frosting, fondant, and other decorations evenly, resulting in a beautiful finished product.
Using a turntable for cake decorating can really boost your skills and make the whole process a lot more fun! The way it smoothly spins can be quite satisfying, letting you dive into the creative side of decorating without worrying about how you can decorate the cake all the way around. Whether you're just starting out or have been decorating for a while, a turntable is a fantastic tool that can help you take your cake decorating to new heights!
Types of Cake Turntables: Which One is Right for You?
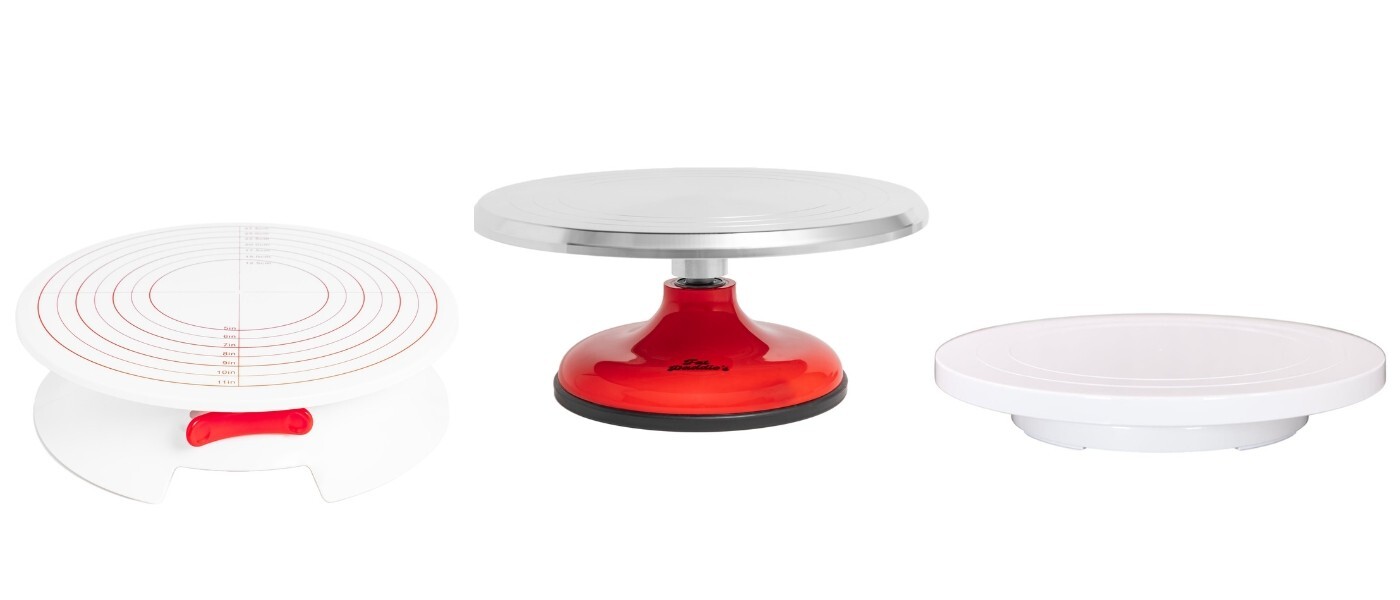
At Because You Cook, we’re delighted to bring you Fat Daddio's cake decorating turntables! They’re budget-friendly and designed for smooth rotation, making your cake decorating experience easy. Check out the turntables we have available.
Next up, we have the Fat Daddio's Cake Turntable with a brake! It measures 12x3.2 inches and boasts a wide, sturdy non-slip base with rubber feet. Made from durable APS plastic, it has sealed radial ball bearings that provide smooth rotation clockwise and counterclockwise. Plus, the locking brake makes it a breeze to work on those intricate details. It even has measurement markings on the turntable top.
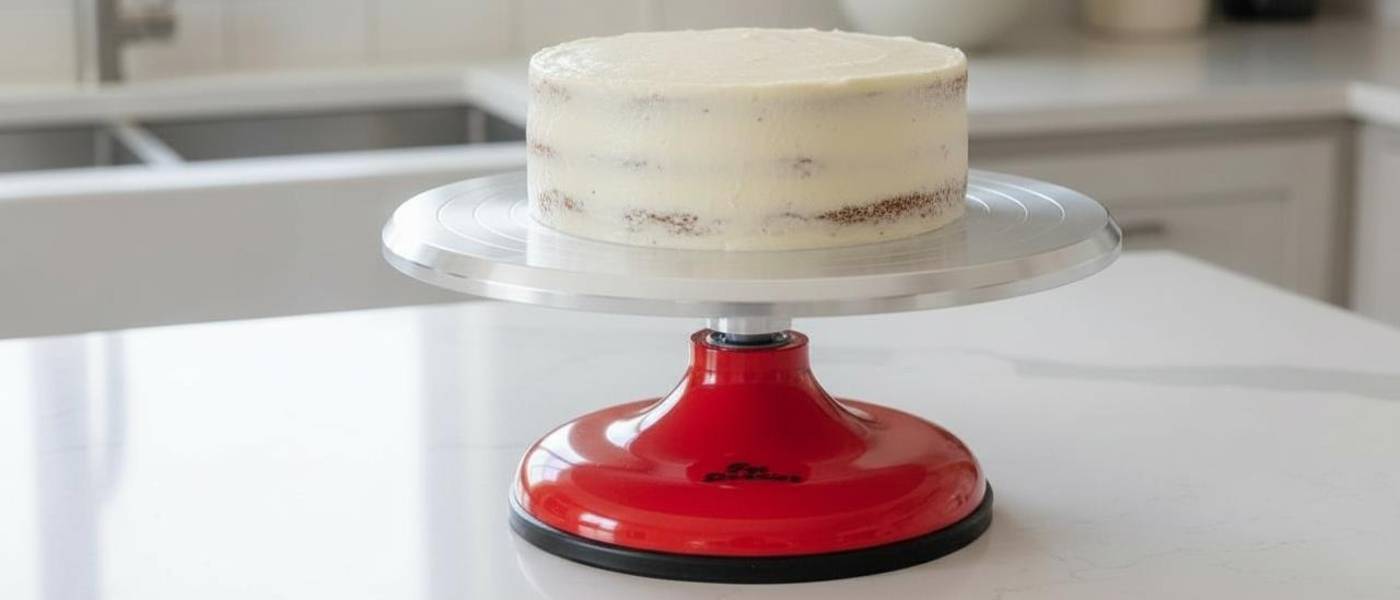
Lastly, don't miss the Fat Daddio's Cake Turntable Stand! This beauty measures 12x5 inches and features a cast aluminum turntable top with sealed radial ball bearings for smooth spinning. Its weighted ABS plastic base ensures it stays put while you work, and the pedestal design allows for a full 360° rotation in either direction.
The 12-inch diameter, 2-inch tall white plastic Fat Daddio's cake decorating turntable features a ball-bearing chain for seamless 360° rotation—both clockwise and counterclockwise! It's durable and super easy to clean with just warm, soapy water.
Essential Tools for Cake Decorating with a Turntable
To make the most of your cake turntable and unleash your decorating creativity, you’ll want to gather some essential tools that can really elevate your cake game! These handy tools make the process a lot more fun and help you achieve those professional-looking results. Let’s dive into some must-haves for your cake decorating toolkit!
To start off, you’ll want a cardboard cake circle! They’re super helpful for easily moving your beautifully decorated cake from the turntable to a cake stand or serving platter.
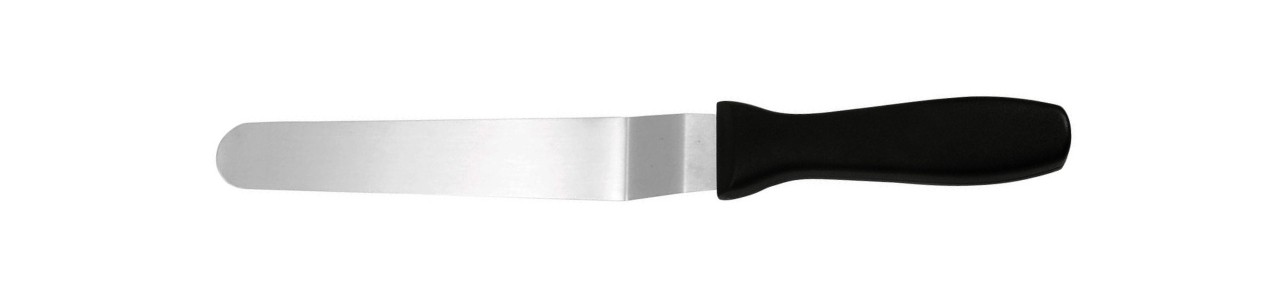
Icing spatulas are essential. You can't go wrong with offset spatulas—they're fantastic for spreading frosting smoothly and evenly. Since they come in different sizes, having a couple of options on hand will really help you tackle different parts of your cake. A straight spatula is also great for spreading and leveling buttercream or another type of frosting on the top and getting those sides nice and smooth!
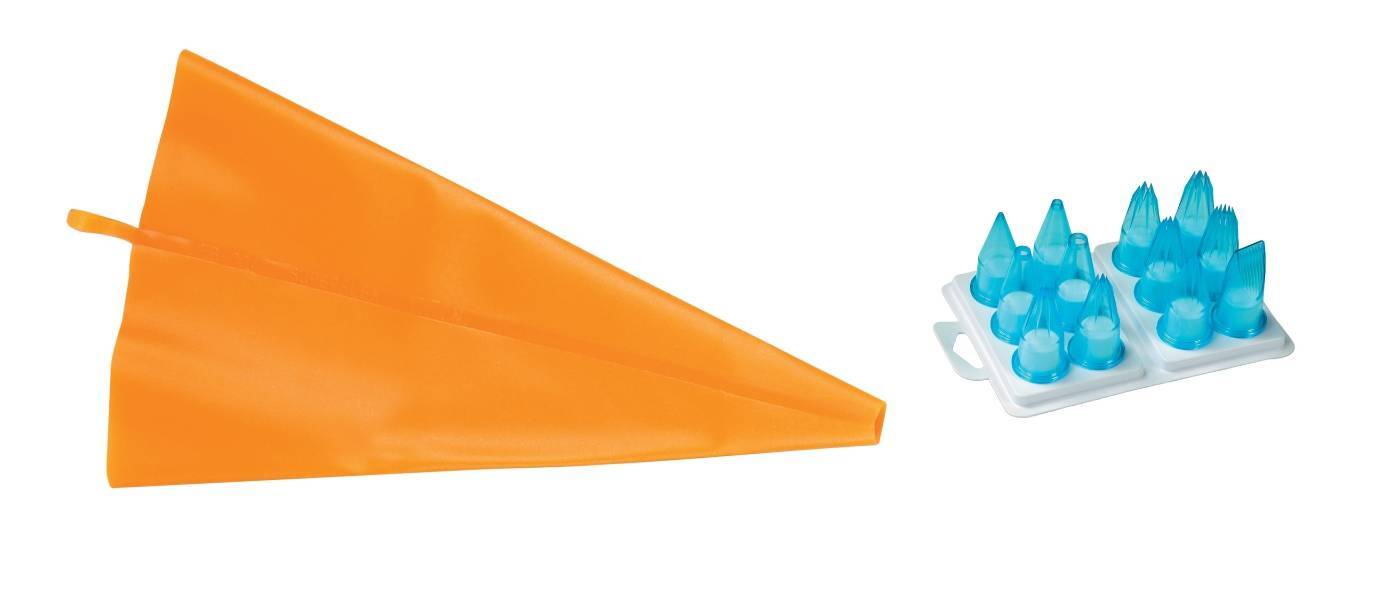
Next, let’s talk about piping bags and tips. These are absolute essentials for any cake decorator! Piping bags let you easily create beautiful designs and decorations. There’s a whole world of piping tips out there, each one perfect for different styles and textures. From simple round tips for writing to star tips that help you whip up charming swirls and rosettes, having a mix of tips at your disposal gives you the freedom to get super creative!
Last but certainly not least, a bench scraper or cake smoother is your best friend for achieving that flawless finish on your cakes. When you work with a turntable, a bench scraper can help you create sharp edges and clean lines with ease. Just hold the scraper against the side of the cake as you spin the turntable—it’s the key to those modern, sleek cake designs.
With these tools in your cake decorating tool kit, you’re all set to bring your cake decorating dreams to life!
Basic Techniques for Using a Cake Turntable
Getting the hang of using a cake turntable is a fantastic first step toward becoming a great cake decorator! These basic skills will set you up for success and help you create stunning, professional-looking cakes.
One of the most important things to master is applying a crumb coat. This is just a thin layer of frosting that catches any pesky crumbs and creates a nice, smooth base for your final frosting layer. To do this, place your cake on the turntable and grab an offset spatula to spread that thin layer all around the cake. As you spread, give the turntable a spin to make sure everything is evenly covered. Once you’ve got that crumb coat on, let the cake chill in the fridge for about 15-20 minutes to help the frosting set.
Next up is smoothing out your frosting! After you've applied the final layer, use a bench scraper to make those sides look super sleek. Hold the scraper at a slight angle against the cake, and while you rotate the turntable, gently glide the scraper to create a smooth finish. For the top, use your trusty offset spatula to level off the frosting, spinning the turntable as you go to get an even look.
And don’t forget about getting creative with borders and decorations! Filling a piping bag with frosting and using different piping tips can really add some flair to your cakes. Hold the bag at a 45-degree angle and apply steady pressure while you spin the turntable to create beautiful borders. It’s a lot of fun to practice different piping techniques—I’m talking shells, rosettes, stars, and more! Keep practicing, and let your creativity shine!
Step-by-Step Guide to Decorating Your First Cake
Decorating your first cake is such a fun and fulfilling adventure! With a few handy tools and some simple techniques, you can whip up a gorgeous cake that will wow your friends and family. Here’s a friendly step-by-step guide to kickstart your cake decorating journey!
Step 1: Bake and Level Your Cake Layers
Start by baking your favorite cake recipe. Once your cakes have cooled off, carefully take them out of the pan. Grab a serrated knife or a cake leveler, and gently trim the tops to make them nice and flat. This little step makes it much easier to stack your layers evenly and decorate your cake.
Step 2: Prepare Your Frosting
Whether you’re using buttercream, ganache, or something else, make sure your frosting is smooth and easy to spread. If it’s too thick, just add a splash of milk or cream to loosen it up. If it’s too runny, you can add more powdered sugar to thicken it up.
Step 3: Prepare Your Turntable
Start by placing a cardboard cake circle on top of your turntable. Add a dollop of frosting right in the center of the circle—think of it as the glue that will keep your first cake layer nice and secure.
Step 4: Assemble Your Cake
Next, place your first cake layer on the cardboard cake circle. Use an offset spatula to scoop a generous amount of frosting onto the top of the layer. As you spread the frosting, spin the turntable to ensure an even layer. Then, add your second cake layer on top and repeat the process. Continue stacking and frosting each layer until your cake is fully assembled.
Step 5: Apply the Crumb Coat
Now, it’s time for the crumb coat! Spread a thin layer of frosting all over the cake; this seals in any crumbs. Use your spatula and a bench scraper to smooth it out while you rotate the turntable. Pop the cake in the fridge for about 15-20 minutes to let that frosting set.
Step 5: Add the Final Layer of Frosting
With your spatula and scraper, spread a thicker layer of frosting over your crumb coat. Keep rotating the turntable to achieve an even finish. Take your time with this step – it really helps your cake look its best!
Step 6: Decorate Your Cake
Time for the fun part! Fill a piping bag with frosting and attach your favorite piping tip. Get creative! Pipe borders, swirls, and other fun designs as you spin the turntable. You can also add sprinkles, edible flowers, or other decorative elements to enhance your design.
Step 7: Finishing Touches
Take a moment to admire your finished masterpiece! Make any final adjustments you desire. And voilà! You’ve successfully decorated your first cake!
Step 8: Transfer Your Cake
Chill your decorated cake in the refrigerator for at least 30 minutes to 1 hour before transferring it from your turntable. This ensures the buttercream or other frosting is firm to the touch, preventing smudges, fingerprints, or structural damage during the move. Carefully transfer your cake to a serving platter or cake stand. A cake lifter can be very helpful for this.
Now celebrate your achievement and enjoy every delicious bite!
Tips for Using a Turntable
Using a cake turntable can be such a delightful experience, but it’s easy to slip up occasionally! Here are some friendly tips to help you avoid common mistakes and make your decorating time a success!
One thing to keep in mind is the importance of using a cardboard cake circle! If you're planning to move your beautiful finished cake to a cake stand or serving platter, this little tool is a game changer. It helps make the transfer smooth and easy, ensuring your cake looks just as perfect on the table as it does when you’re decorating it!
When it comes to smoothing your frosting, remember to be gentle! Using a light touch with your offset spatula or bench scraper will help you achieve that perfect finish without lifting the frosting or creating uneven surfaces. Just let your tools do the work and enjoy the process!
Also, keep an eye on your piping bag. Overloading it can make it tricky to control the flow of frosting and create those lovely designs you have in mind. Try to fill your bag no more than two-thirds full and just refill as needed. This way, you’ll have great control and can easily create clean, beautiful decorations.
Advanced Cake Decorating Techniques for Turntable Users
Once you’ve gotten the hang of the basic decorating techniques, it’s time to have some fun and dive into more advanced methods! These techniques will help you create eye-catching, professional-looking cakes that are sure to wow everyone who sees them. Let’s explore some fun ideas you can try with your turntable!
One exciting technique is creating beautiful ombre effects with frosting. To get this lovely look, you’ll want at least two shades of frosting. Start by spreading the darkest shade at the bottom of the cake, and then gradually switch to lighter shades as you move up. Use your offset spatula and bench scraper to blend those colors together, turning the turntable as you go to achieve a smooth gradient. It’s like painting your cake!
Another wonderful way to decorate is by using fondant to make lovely, detailed decorations. Fondant is super fun to work with since it’s soft and easy to shape. Roll it out to your desired thickness, then use cookie cutters or a sharp knife to create all sorts of shapes. There are even fondant molds that help you make intricate patterns and textures! Once your fondant pieces are ready, pop them onto your cake with a little water or edible glue.
And if you're feeling adventurous, why not try creating multi-tiered cakes? These can really elevate your cake-decorating game! To make a fabulous multi-layer cake, you’ll need to stack and properly support the different tiers. Use dowels or cake supports to keep everything stable and secure. Once your tiers are stacked, use your turntable again to add frosting and decorations.
Conclusion: Elevate Your Cake Decorating Skills with a Turntable
A cake turntable is an invaluable tool for anyone looking to elevate their cake decorating skills. By providing a stable, rotating platform, a turntable allows for more precise and efficient decorating, resulting in professional-quality cakes. Whether you're a beginner or an experienced decorator, mastering the use of a turntable can help you achieve beautiful, polished results.
From learning essential techniques and avoiding common mistakes to advanced cake decorating techniques, this guide has covered what you need to know to get started with a cake turntable. With practice and patience, you can develop the skills and confidence to create stunning cakes that will impress your friends, family, and clients.
Investing in a cake turntable and the necessary tools is a worthwhile step towards becoming a skilled cake decorator. By following the tips and techniques outlined in this guide, you can unlock your full potential and take your cake decorating to new heights. So go ahead, give it a spin, and discover the joy of creating beautifully decorated cakes with a turntable.